Appointment Status Configuration
Overview
Calendar Event Statuses allow you to define and customize appointment statuses. These statuses help track appointment lifecycles and automate various appointment-related processes.
Accessing Calendar Event Status Configuration
Navigation Path:
- Go to Appointments module
- Click on Configuration
- Select Calendar Event Status

Creating a New Calendar Event Status
From the Calendar Event Status configuration page, you can create new statuses by clicking the "New" button.


Configuration Fields
When creating or editing a calendar event status, you'll need to configure the following fields:
1. Name (Required)
- Enter the name of the appointment status
- This is how the status will appear throughout the system
- Examples: "No Show", "Confirmed", "Cancelled", "Completed"
2. Color (Required)
- Select a color for visual identification
-
Impact: The selected color will be displayed as a colored indicator at the top of appointments with this status
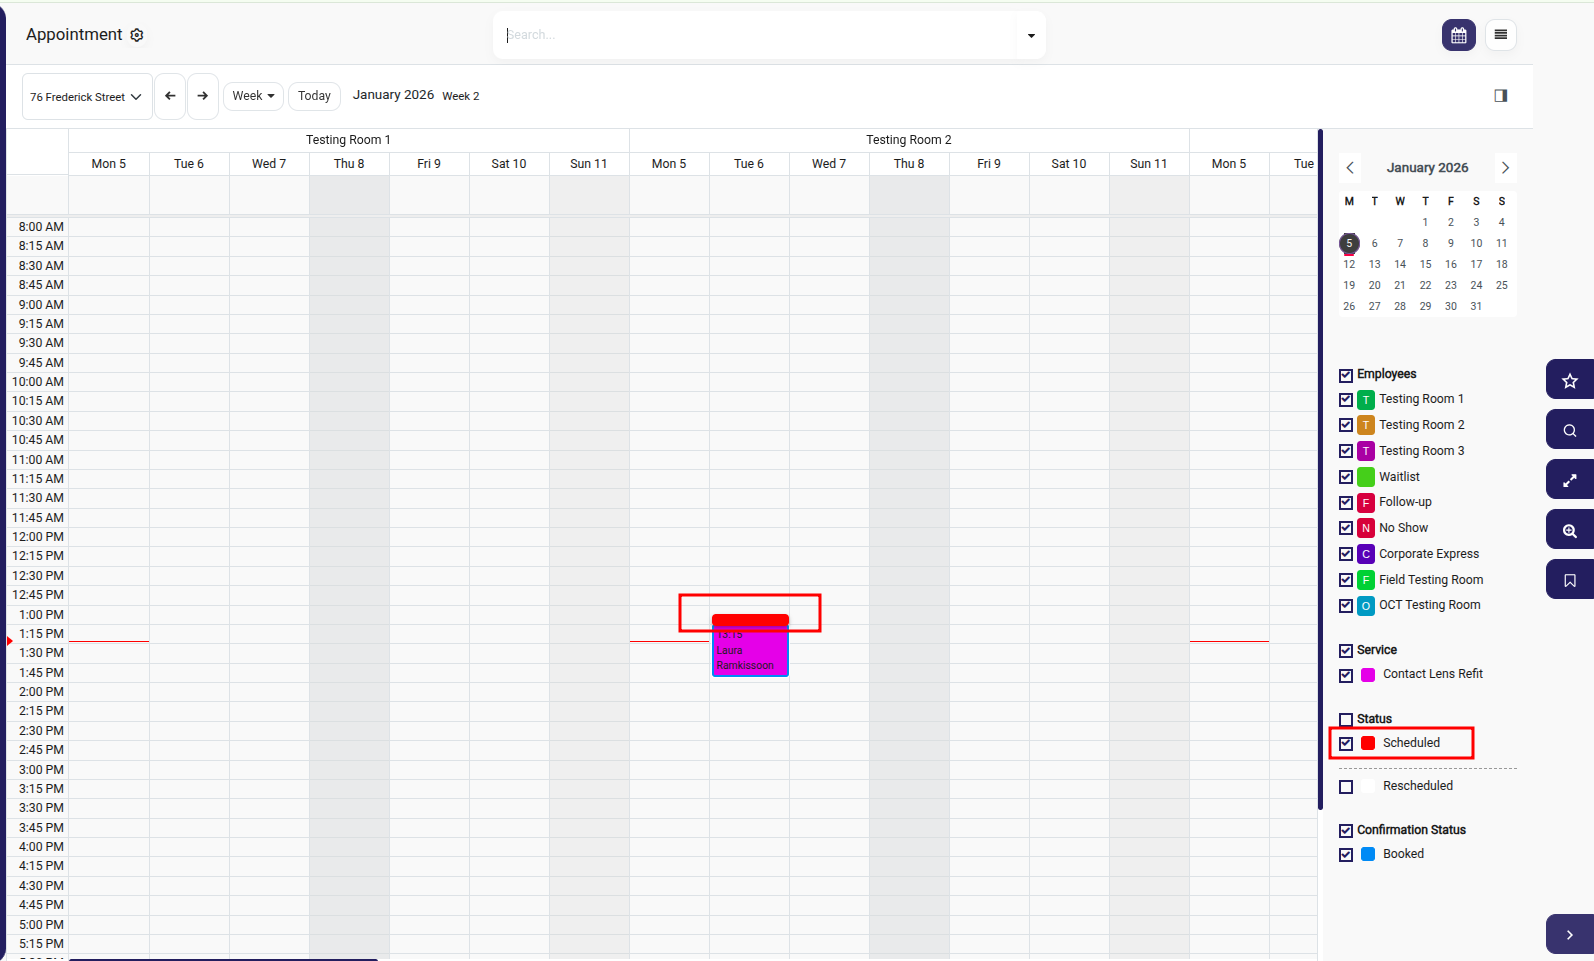
- This helps quickly identify appointment statuses in the calendar view

3. Booking Status
- Checkbox option to enable/disable booking status tracking
- Impact: When enabled, status changes to this status in appointments will be tracked in the Appointment Analysis Report
- Use this for statuses you want to monitor and analyze (e.g., cancellations, no-shows)
4. Sequence
- Enter a numeric value to define the display order
- Lower numbers appear first in status lists
- Helps organize statuses in a logical workflow order
5. Reason Required
- Checkbox option to enable/disable reason requirement
-
Impact: When enabled, changing an appointment to this status will display a field where users must enter the appointment Reschedule reason
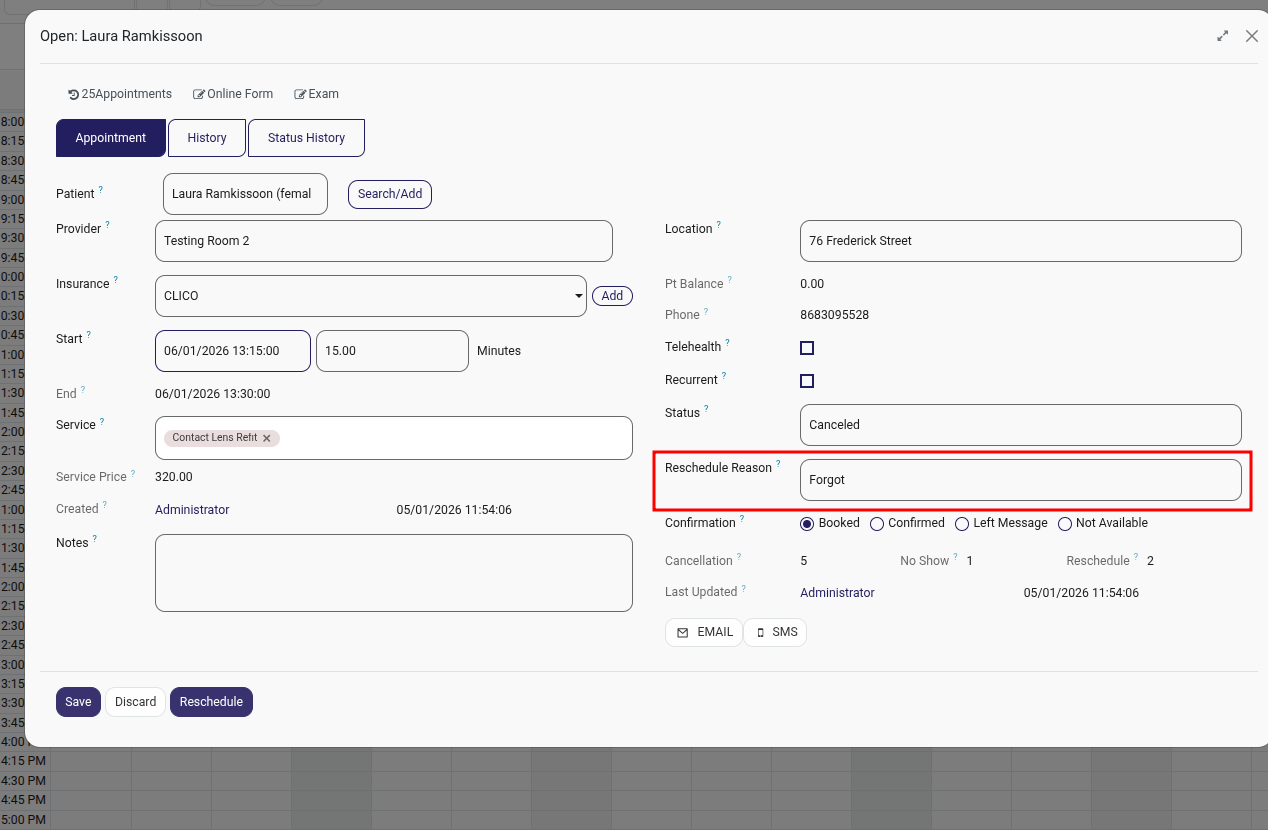
- Useful for tracking why appointments are cancelled or rescheduled

6. Update Recall Date
- Checkbox option to enable/disable automatic recall date updates
- Impact: When enabled, changing an appointment to this status will:
- Automatically trigger recall date calculation based on service or patient settings
- Set the follow-up date to the new calculated recall date
- Ideal for statuses like "Completed" where you want to schedule future appointments
Best Practices
- Use Distinct Colors: Choose colors that are easily distinguishable from each other for quick visual identification
- Enable Booking Status Tracking: Enable this for statuses that impact business metrics (No-Show, Cancelled, Confirmed)
- Require Reasons for Important Changes: Enable "Reason Required" for cancellations and no-shows to maintain proper documentation
- Logical Sequencing: Order statuses in a way that reflects your appointment workflow (e.g., Scheduled → Confirmed → Completed)
- Recall Date Automation: Enable "Update Recall Date" for completion statuses to automate patient follow-up scheduling
Example Status Configurations
| Status Name | Color | Booking Status | Reason Required | Update Recall Date |
|---|---|---|---|---|
| Scheduled | Blue | ✓ | ✗ | ✗ |
| Confirmed | Green | ✓ | ✗ | ✗ |
| No Show | Yellow | ✓ | ✓ | ✗ |
| Cancelled | Red | ✓ | ✓ | ✗ |
| Completed | Purple | ✓ | ✗ | ✓ |
Note: Changes to calendar event statuses will take effect immediately across the system. Ensure all staff members are informed of new statuses and their meanings.