Exam Creation
Note :- To create an exam, you first need to create an Appointment, as the exam will be based on that appointment.
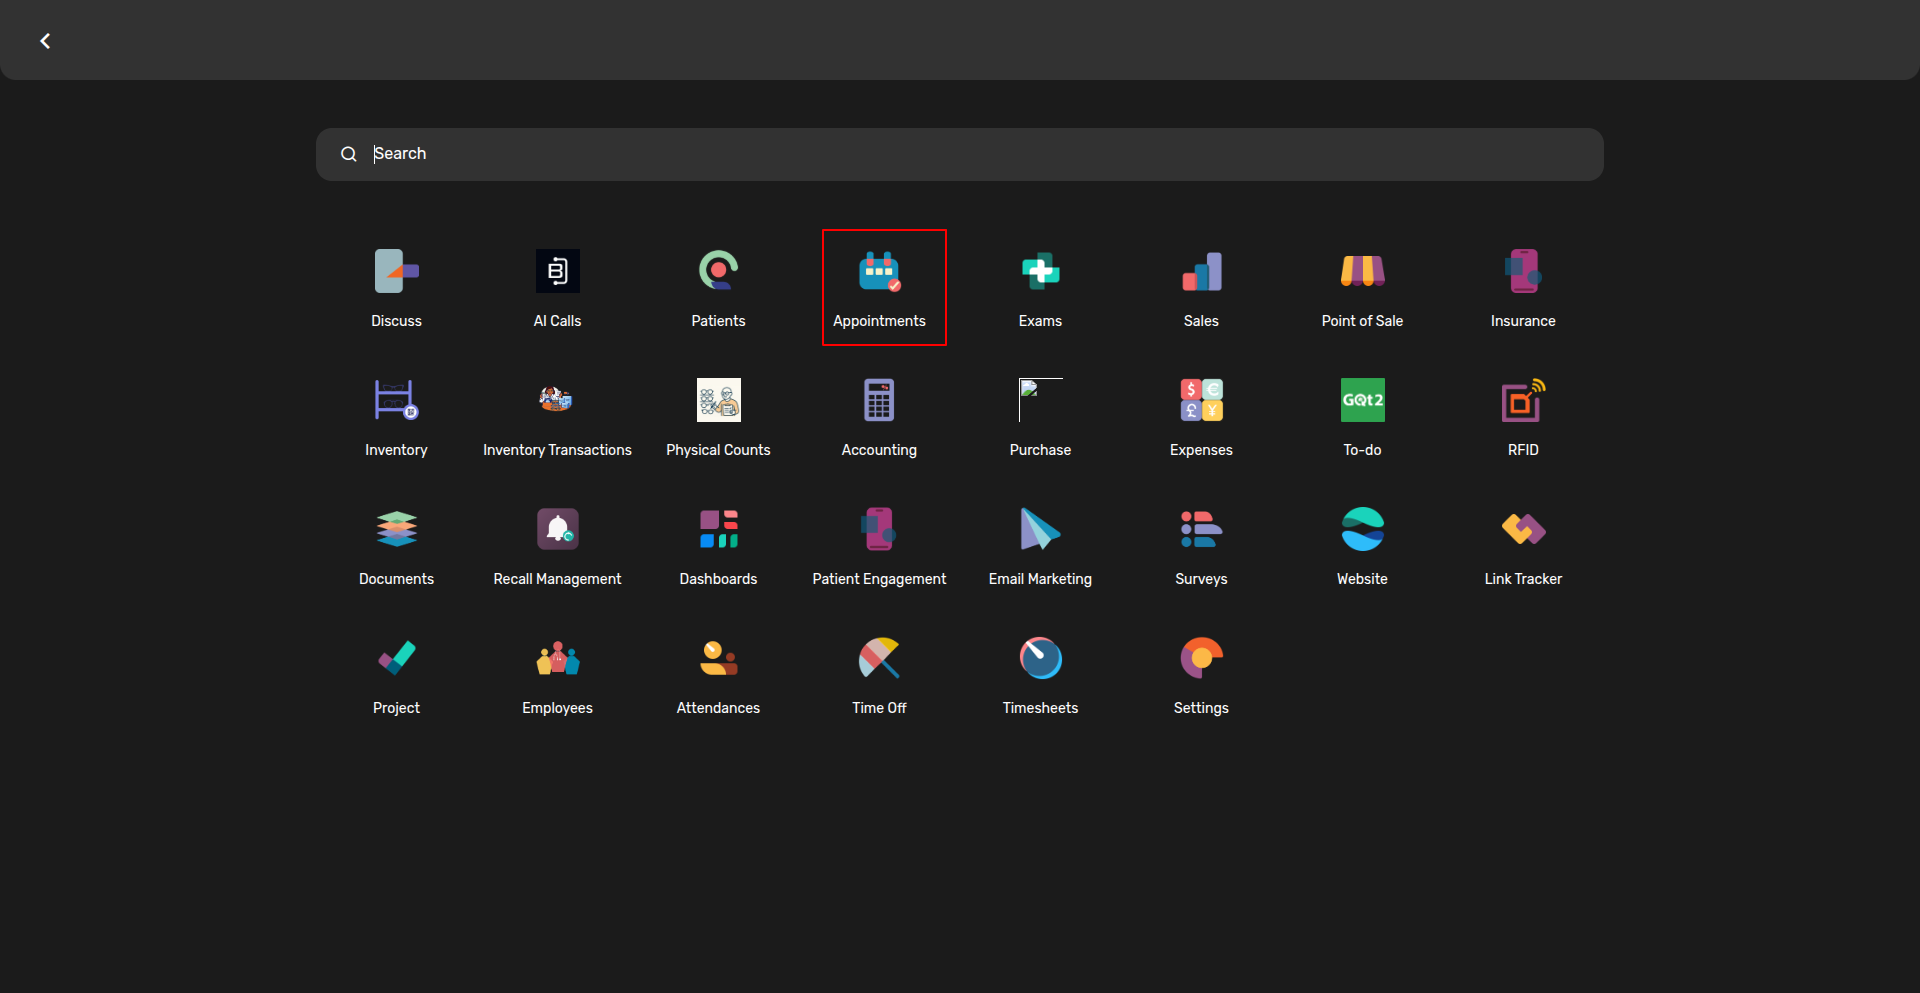
To do this, navigate to the Appointment menu.
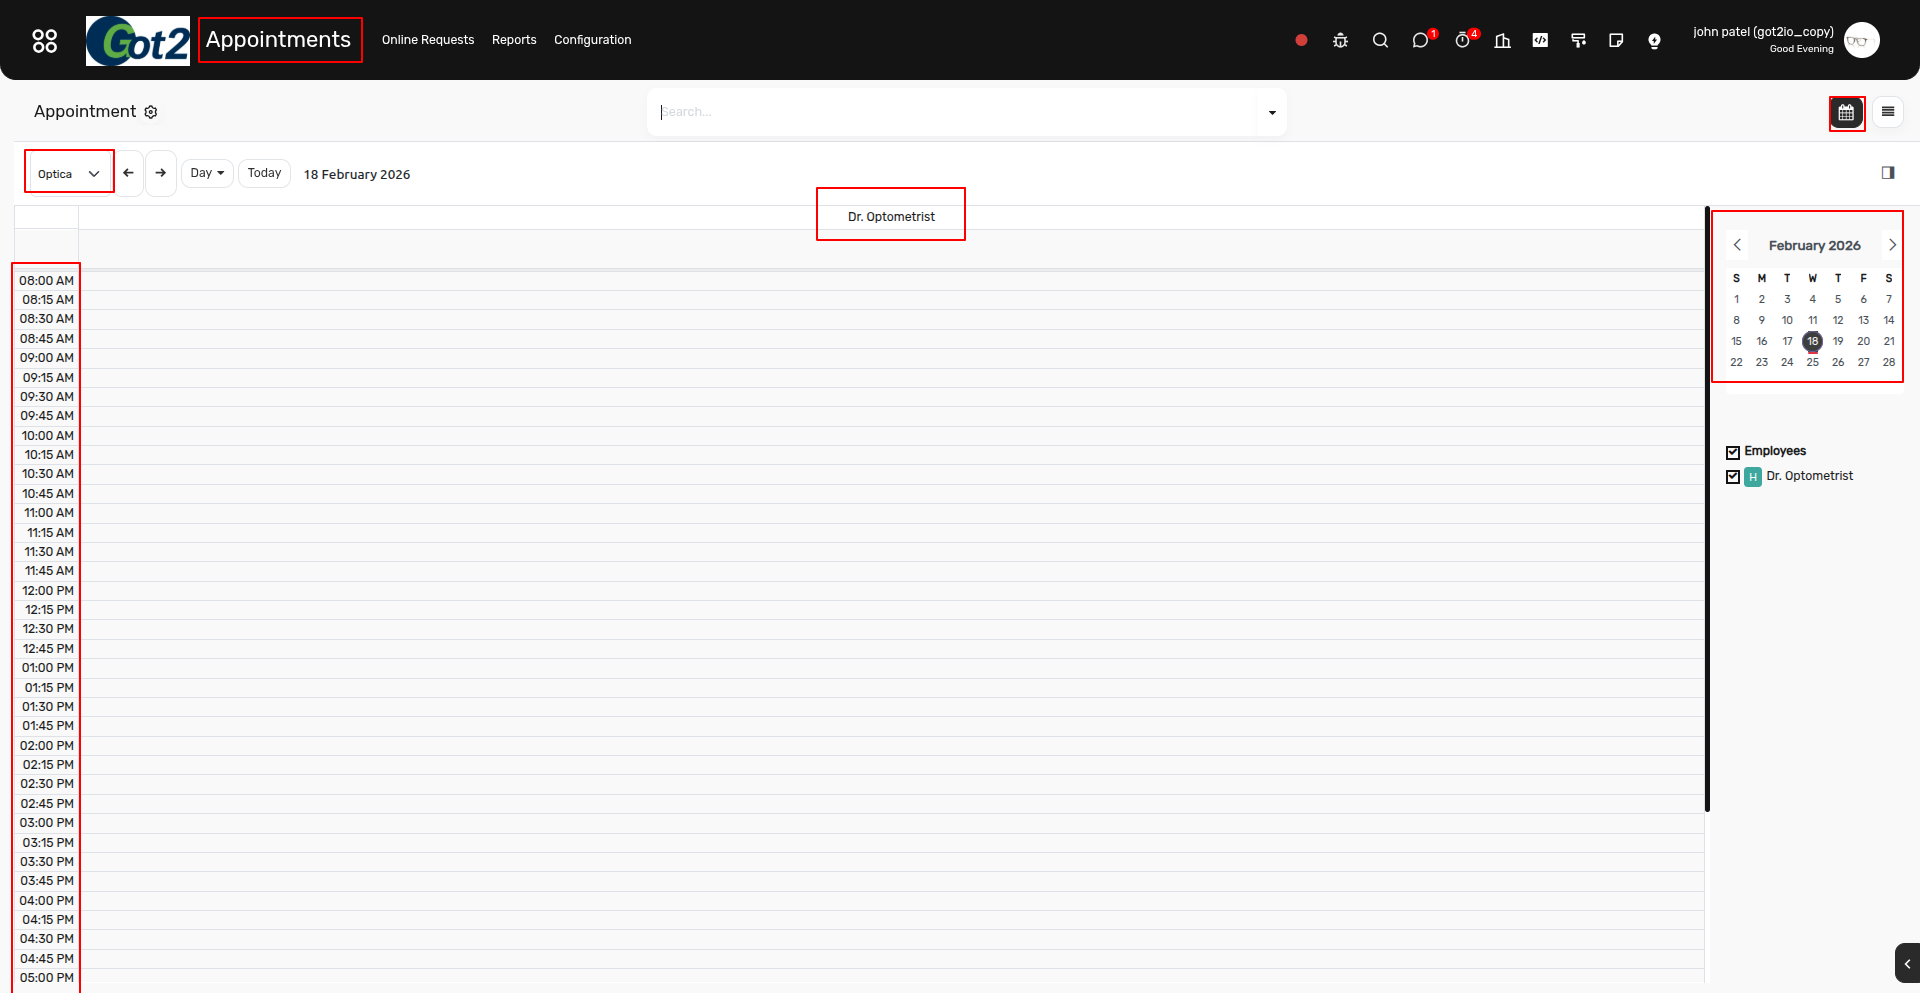
After navigating to the Appointment menu, you will see the Calendar View.
- In the Header Section, locate the Location (Company) option and select the location where you want to create the appointment and exam.
- In the same header, find the Physician section and select the desired physician.
- In the calendar, locate the Date and Time you want to schedule the appointment.
- Click on the chosen time slot to create the appointment.
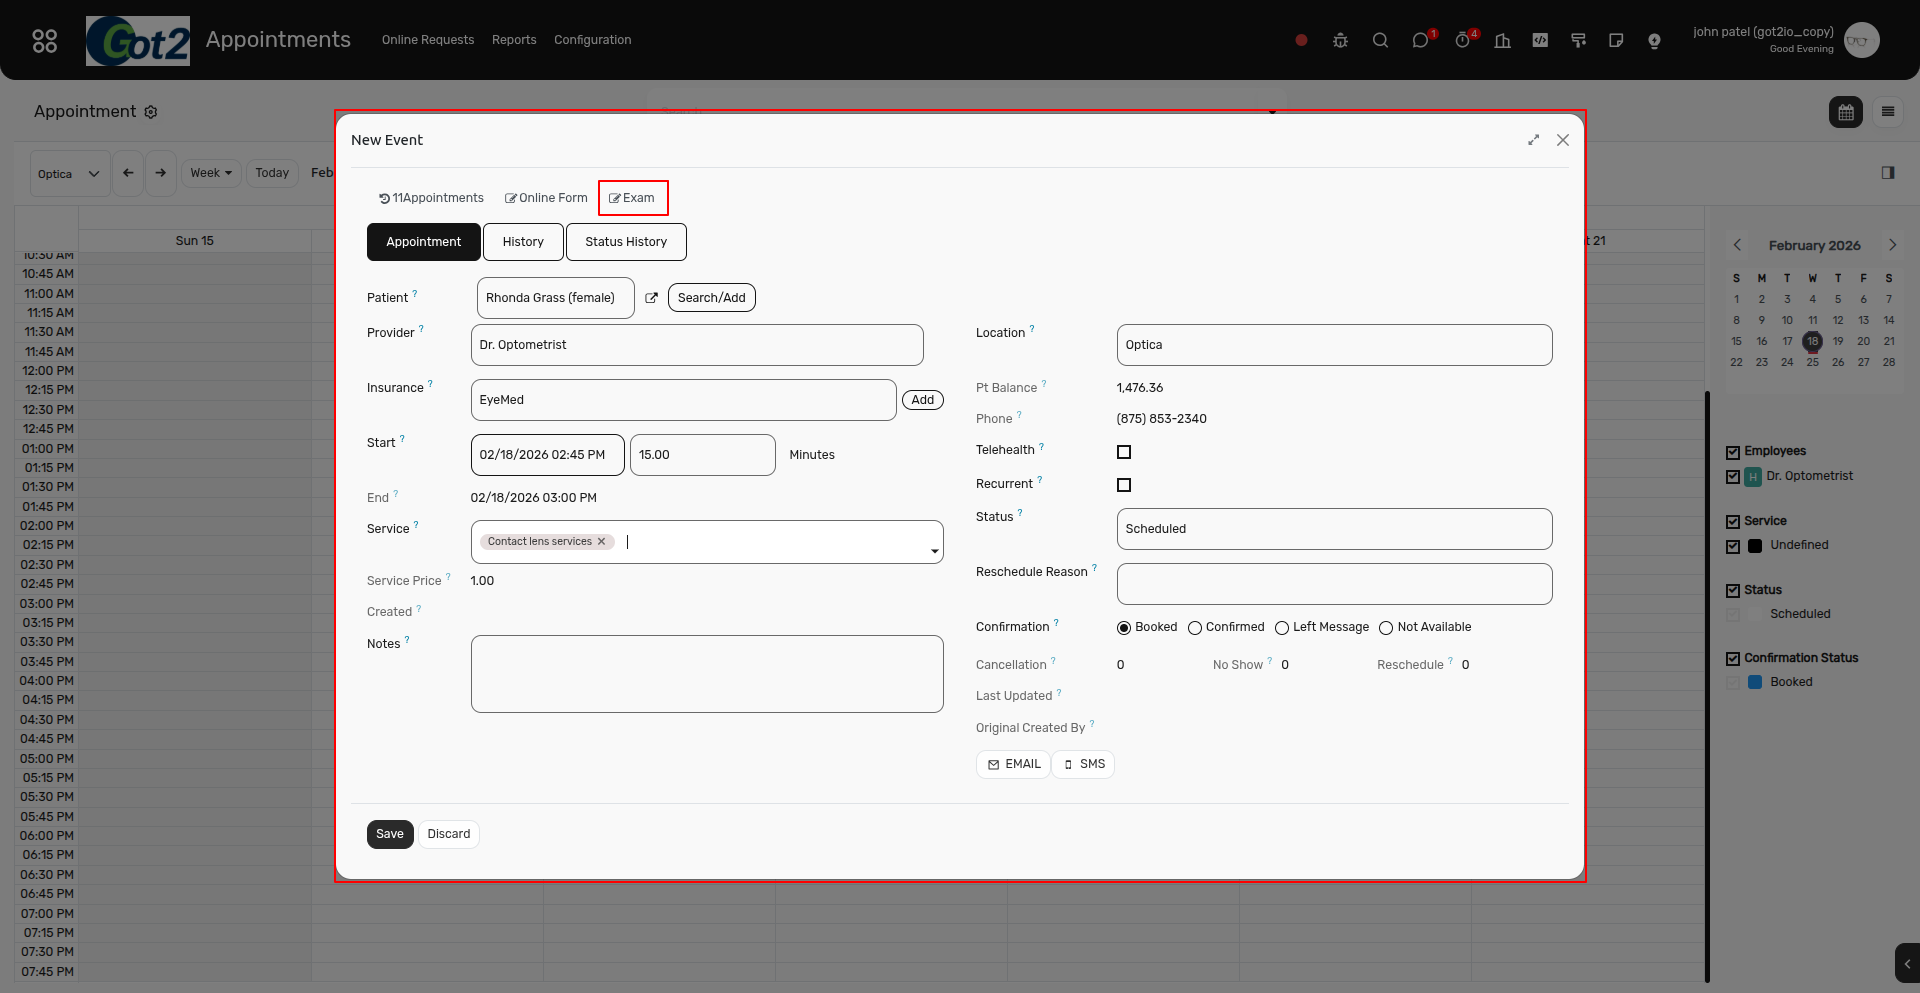
After clicking the time slot, a popup window will appear:
- Select the Patient – You can use the Search/Add button to find the patient.
- Select the Insurance (if needed) – You can also create a new insurance record for the selected patient.
- Add the Service/Product if required.
- Fill other optional fields as needed.
- Confirm the Date, Time, and Provider.
- Click the Exam button to create an exam linked to this appointment.
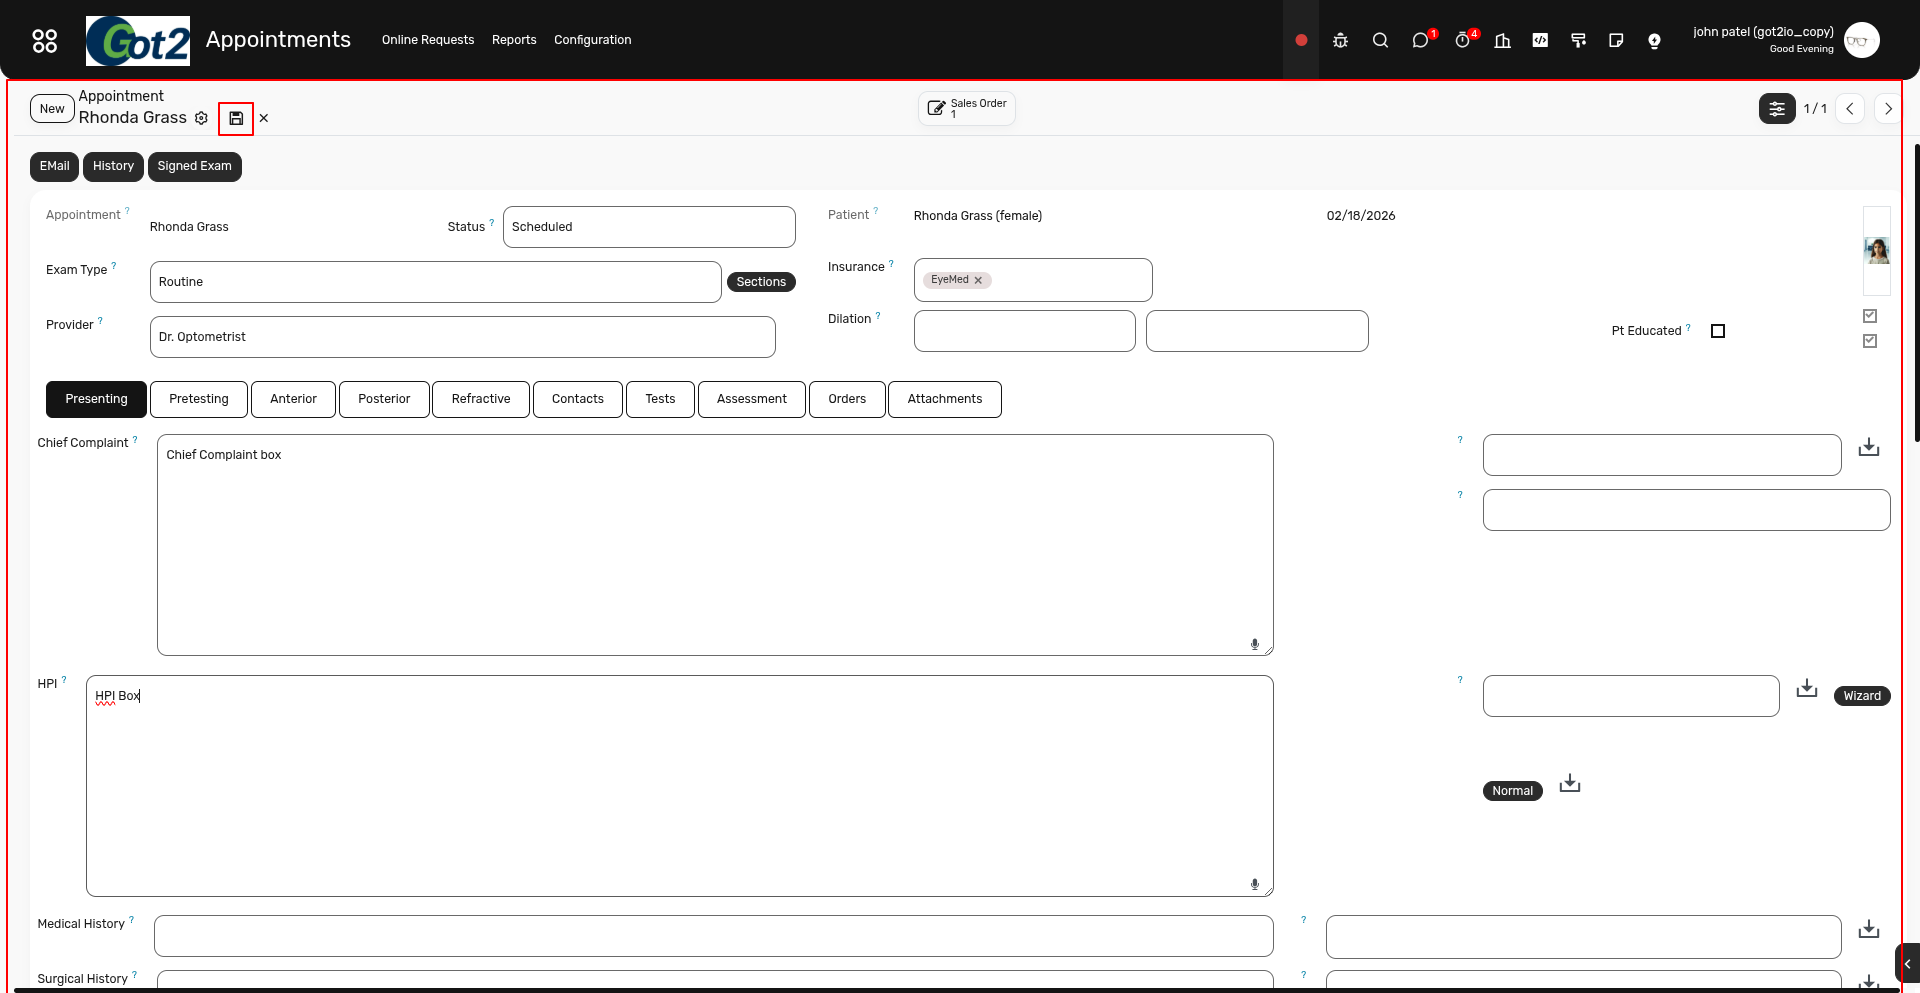
After that, you will be taken to the Exam Form View.
-
Fill out any additional optional fields as needed.
You will see various tabs in the exam form, including:
- Presenting
- Pretesting
- Anterior
- Posterior
- Refractive
- Contacts
- Tests
- Assessment
- Orders
- Attachments
- Review and fill out the relevant fields in each tab.
- Once all required and optional information is completed, click Save to store the exam.
Your appointment and exam are now successfully created.
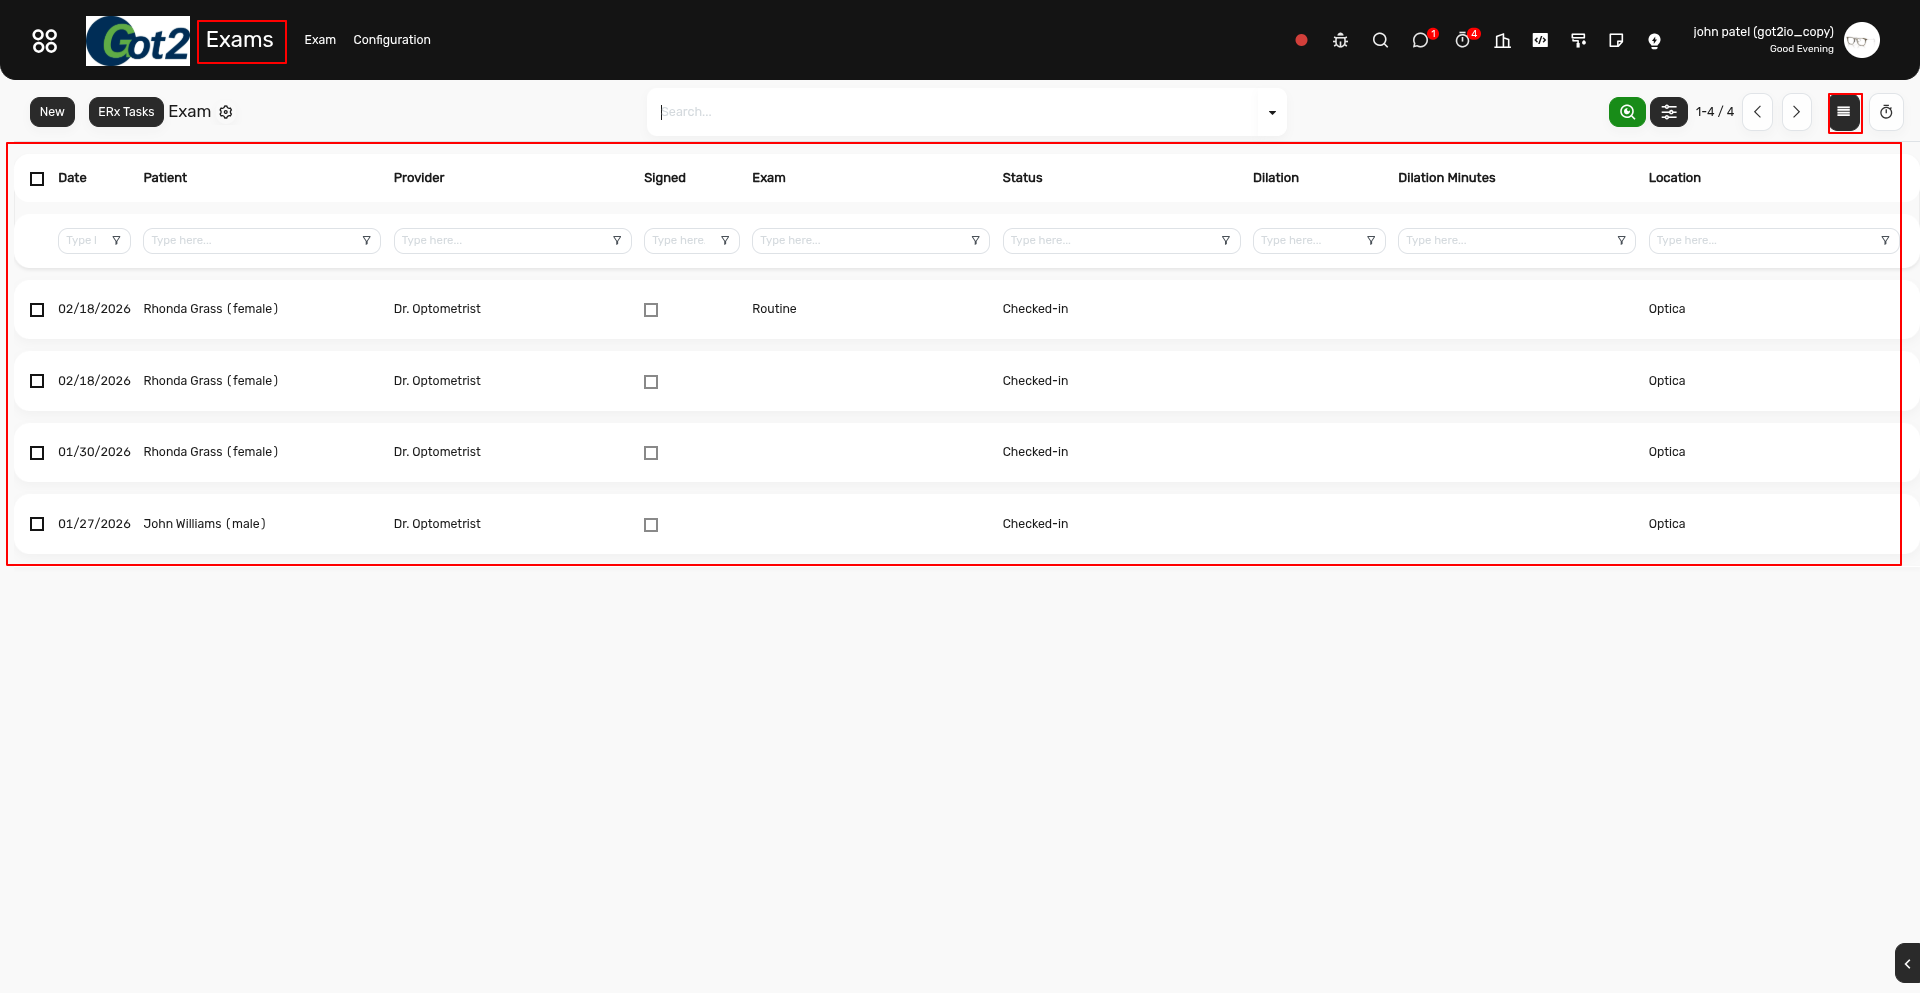
Now, if you want to view the exam records, simply navigate to the Exam module.

In the Exam List View, you can see all the exam records.